Ch4_3. 지그비 구동하기
학습 내용
SD 카드홀더가 장착되어 있는 Workshop 보드에서 SD카드에 데이터를 저장하는 과정을 학습하게 됩니다.
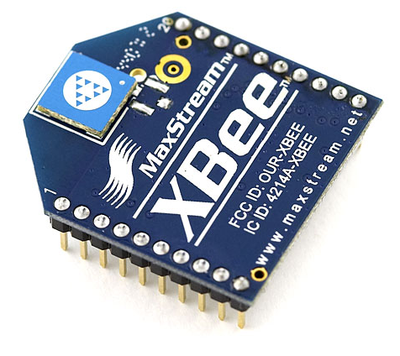
배선도 & 회로도
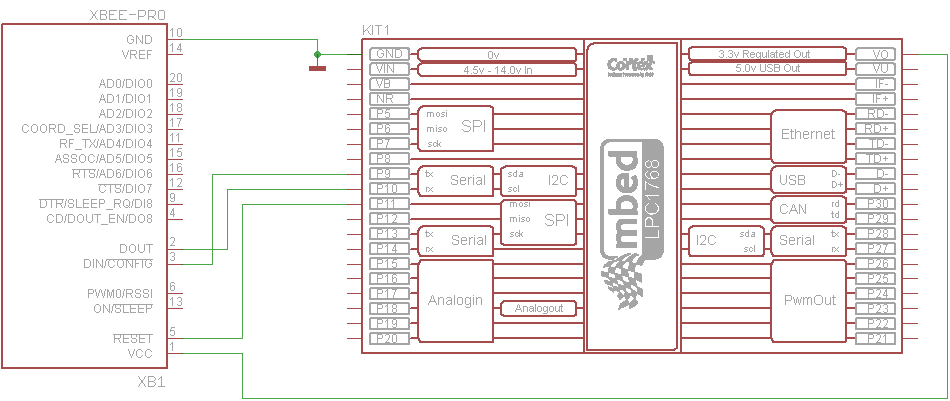
- 1 VCC :3.3v
- 2 DOUT :mbed serial rx (e.g. p10)
- 3 DIN :mbed serial tx (e.g. p9)
- 4 not connected
- 5 RESET :mbed digital out (e.g p11)
- 6-9 not connected
- 10 GND :0v/GND
- 11-20 not connected
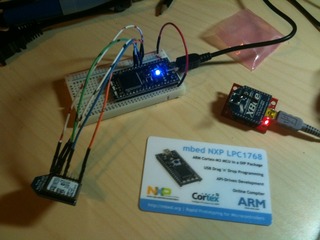
배선 사진
코딩
/**
 * XBee Example Test
 * A test application that demonstrates the ability
 * of transmitting serial data via an XBee module with
 * an mbed microprocesor.
 * By: Vlad Cazan
 * Date: Tuesday, September 29th 2009
 */

#include "mbed.h"

Serial xbee1(p9, p10); //Creates a variable for serial comunication through pin 9 and 10

DigitalOut rst1(p11); //Digital reset for the XBee, 200ns for reset

DigitalOut myled(LED3);//Create variable for Led 3 on the mbed
DigitalOut myled2(LED4);//Create variable for Led 4 on the mbed

Serial pc(USBTX, USBRX);//Opens up serial communication through the USB port via the computer

int main() {
    rst1 = 0; //Set reset pin to 0
    myled = 0;//Set LED3 to 0
    myled2= 0;//Set LED4 to 0
    wait_ms(1);//Wait at least one millisecond
    rst1 = 1;//Set reset pin to 1
    wait_ms(1);//Wait another millisecond

    while (1) {//Neverending Loop
        if (pc.readable()) {//Checking for serial comminication
            myled = 0; //Turn Led 3 Off
            xbee1.putc(pc.getc()); //XBee write whatever the PC is sending
            myled = 1; //Turn Led 3 on for succcessfull communication
        }
    }
}
라이브러리
학습 참고
Please log in to post comments.
